Most itineraries begin with museum lists and restaurant reservations. If you want a trip that leaves your legs pleasantly sore and your camera full of summit shots, flip the script.
Start with the Adventure, Not the Attractions
This guide walks you through building a city itinerary designed around outdoor adventure, then weaving culture, food, and nightlife around it. Follow the steps once, and you’ll never plan a city trip the same way again.
Step 1: Define Your Adventure Priorities
Before you open a map or guide, answer three questions:
What kind of terrain excites you most right now?
- Peaks and ridges - Coasts and islands - Forests and rivers - Mixed urban trails
How intense do you want your days to be?
- Light (walks, casual cycles) - Moderate (half-day hikes, longer rides) - Hard (full summit pushes, big elevation)
What’s non-negotiable?
- A sunrise summit? - A surf lesson? - A full-day bike route?
Write these down. They’ll guide every decision that follows.
Step 2: Choose the Right Neighborhood Basecamp
Within your chosen city, neighborhood matters as much as the city itself.
Look for Three Things
Transit Access
- Near a train/metro hub with lines heading to hills, coast, or countryside.
Proximity to Green Space
- Walking distance to at least one park, riverfront, or hill.
Affordable Food Options
- A mix of markets, bakeries, and casual eateries for easy fueling.
Use city guides and map apps to cross-check. This might mean staying one metro stop away from the most touristed core—but it pays off in freedom and budget.
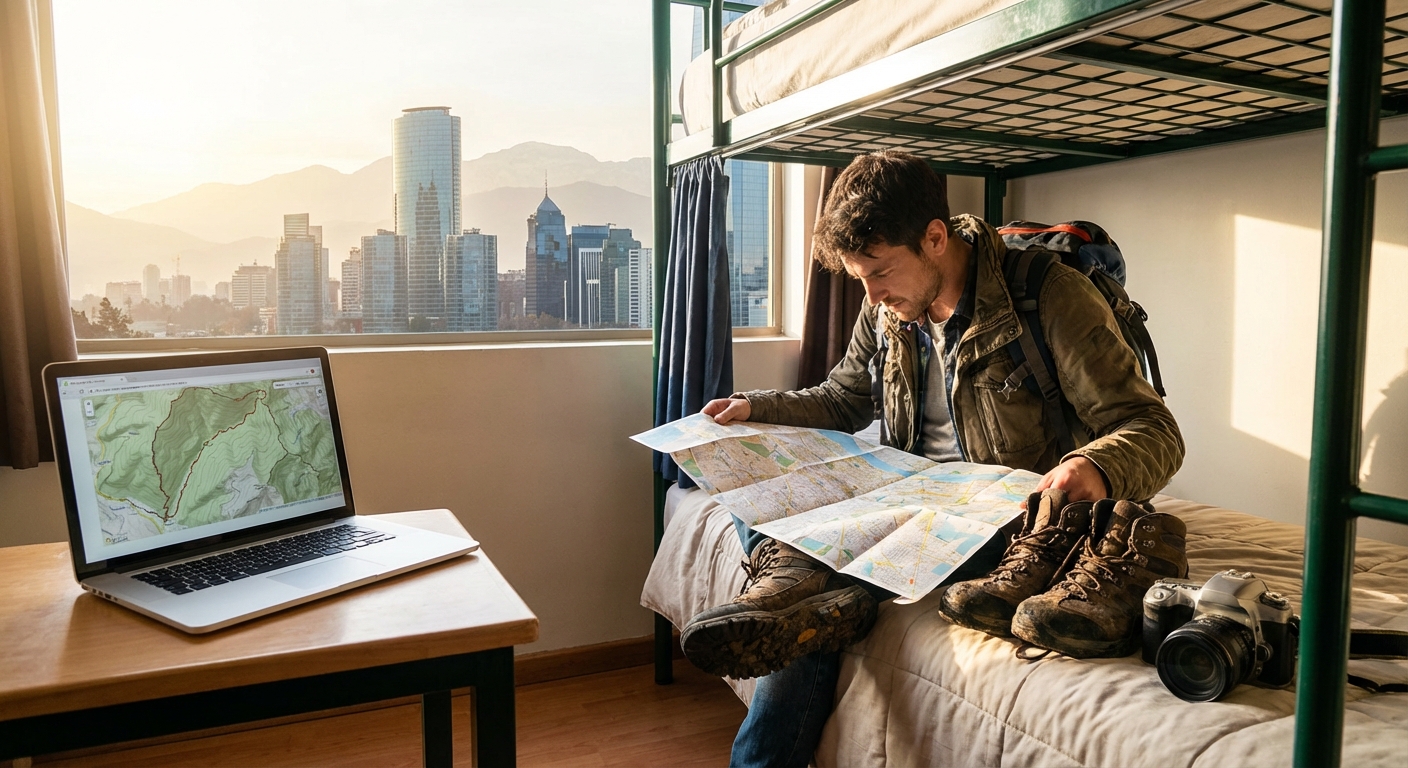
Step 3: Map Your Adventure “Anchors” First
Your adventure anchors are the big experiences that shape your days.
Examples:
- A day hike to a peak overlooking the city.
- A full-day coastal walk between two fishing villages.
- A long river ride connecting several parks.
How to Find Them
- Search
"[City] best day hikes","[City] coastal walk","[City] cycling loop". - Check the day trips section of city guides.
- Look for national parks, reserves, or islands mentioned from the city.
Pick 1–3 anchors depending on trip length:
- Weekend: 1 anchor.
- 4–5 days: 2 anchors.
- Week or longer: 3 anchors, spaced with rest/culture days.
Step 4: Sketch a Skeleton Itinerary
Start with the anchors, then fill gaps with city experiences.
Example: 5-Day Adventure-First City Itinerary
Day 1 – Arrival + Urban Recon
- Check in, drop luggage.
- Easy orientation walk through the old town or main district.
- Sunset at a nearby hill or riverside park.
Day 2 – Anchor #1: Day Hike
- Early train/bus to a scenic trail.
- Full-day hike.
- Return for a casual dinner near your accommodation.
Day 3 – City + Light Activity
- Morning run in a big city park.
- Midday museum or neighborhood exploration.
- Evening food market.
Day 4 – Anchor #2: Coast, Island, or Bike Route
- Ferry or train to coastline or countryside.
- Walk, ride, or paddle.
- Dinner in a new neighborhood back in the city.
Day 5 – Flex + Departure
- Revisit your favorite area.
- Short hike or riverside stroll.
- Last snacks from a market before you head out.
Adjust this framework to your dates and flight times, but always drop the adventure pins first.
Step 5: Build a Practical Packing List Around Your Plan
With your anchors set, refine your packing list to what you actually need.
Core Clothing (Adventure-Ready, City-Appropriate)
- 2–3 quick-dry tops (one nicer for evenings).
- 1–2 pairs versatile pants/shorts suitable for trail and town.
- 1 light insulating layer (fleece or down).
- 1 waterproof/windproof shell.
- 3–4 pairs performance socks.
- 1 pair trail-capable shoes (ideally your main shoes).
Gear Essentials
- Daypack (20–30L) with hip and chest straps.
- Hydration system (bottle or bladder, min 1.5L capacity).
- Micro first-aid kit (include blister care, pain relief, tape).
- Headlamp (always—plans change).
- Offline maps for city and surrounding region.
Optional Adventure Extras (Depending on Trip)
- Trekking poles (collapsible) if doing big elevation.
- Swimwear + towel for coastal or lake cities.
- Compact lock for storing gear or securing a bike.
Pack with the goal of carrying one main backpack or suitcase + one daypack—no more.
Step 6: Budget with Adventure in Mind
Your budget choices should prioritize experiences over convenience.
Where to Spend
- Transport to adventure anchors (trains, ferries, shuttle buses).
- Occasional gear rental or guiding for technical routes.
- One or two memorable meals with a view.
Where to Save
- Stay in simple accommodations near transit rather than high-end central hotels.
- Eat breakfast from markets or bakeries.
- Use public transport and bike-share instead of taxis.
Create a simple budget outline:
- Daily food: X
- Accommodation: Y
- Adventure transport/fees: Z
Then pad Z slightly—you’ll always want one more trail.
Step 7: Weave in Local Flavor Without Losing Momentum
An adventure-first trip doesn’t mean skipping culture; it means weaving it around your active hours.
Morning Movement, Midday Museums
- Use early mornings for hikes, runs, or waterfront walks.
- Schedule indoor sights (museums, galleries) during the hottest or most crowded hours.
Food as Cultural Fuel
- After a big day out, aim for:
- Local comfort dishes.
- Neighborhood street food or family-run eateries.
- Let your appetite guide your cultural exploration: where locals queue, go.
Night Walks and Viewpoints
- Many cities sparkle after dark.
- Plan at least one nighttime viewpoint or river walk when your legs allow it.
Step 8: Use Local Intel to Refine the Plan
Arrive with a solid skeleton—but keep it flexible.
Ask the Right People, the Right Questions
- Hostel or hotel staff: “If you had one day off and a small budget, where would you go outside the city?”
- Outdoor shops and climbing gyms: “Is there a trail or crag I can reach without a car?”
- Runners and cyclists (in stores or parks): “Favorite loop within an hour of here?”
Be ready to swap a planned museum day for a local-recommended ridge walk.
Step 9: Safety and Sustainability Checks
Adventures that start in cities can still go wrong if you under-prepare.
Safety Checklist
- Tell someone (host, friend, family) where you’re going and when you’ll be back.
- Check weather and trail conditions the night before.
- Pack extra layers, snacks, and a headlamp even for “easy” hikes.
Sustainability Principles
- Use public transport where possible.
- Stick to marked trails and follow local guidelines in parks.
- Support local businesses—markets, small cafés, independent gear shops.
Step 10: Debrief and Document for Next Time
After your trip, take 10–15 minutes to:
- Note which parts of your itinerary felt perfectly balanced.
- Identify what you overpacked or underpacked.
- Save your favorite routes, cafés, parks, and viewpoints.
This becomes your personal city adventure guide, ready to share with friends or adapt for your next destination.
Your Next City is Waiting
The right itinerary turns any city into an adventure hub: sunrise runs along the river, ridge walks above the skyline, bike loops through hidden parks, and evenings immersed in local food and stories.
Pick a city that’s been sitting on your wish list. Open a map. Drop a pin on the nearest mountains, forests, or coastline. Then work backwards with this guide—packing list, anchors, budget, and all—until the only thing left is to book the ticket and step into your next urban adventure.